
Textr Help Center
Post Category
Related Posts
How Can I Install An eSIM on iPhone or iPad?
Rick Xi
Content Editor and Customer Support at Textr
After you check your iPhone or iPad is eSIM compatible and network unlocked, you can prepare to install an eSIM. For successful installation and setup of your eSIM, you should have a stable internet connection, preferably WiFi.
With iPhone 13 and later, you can use either two active eSIMs or a physical SIM and an eSIM. Other models may only support one eSIM at a time.
Get Started
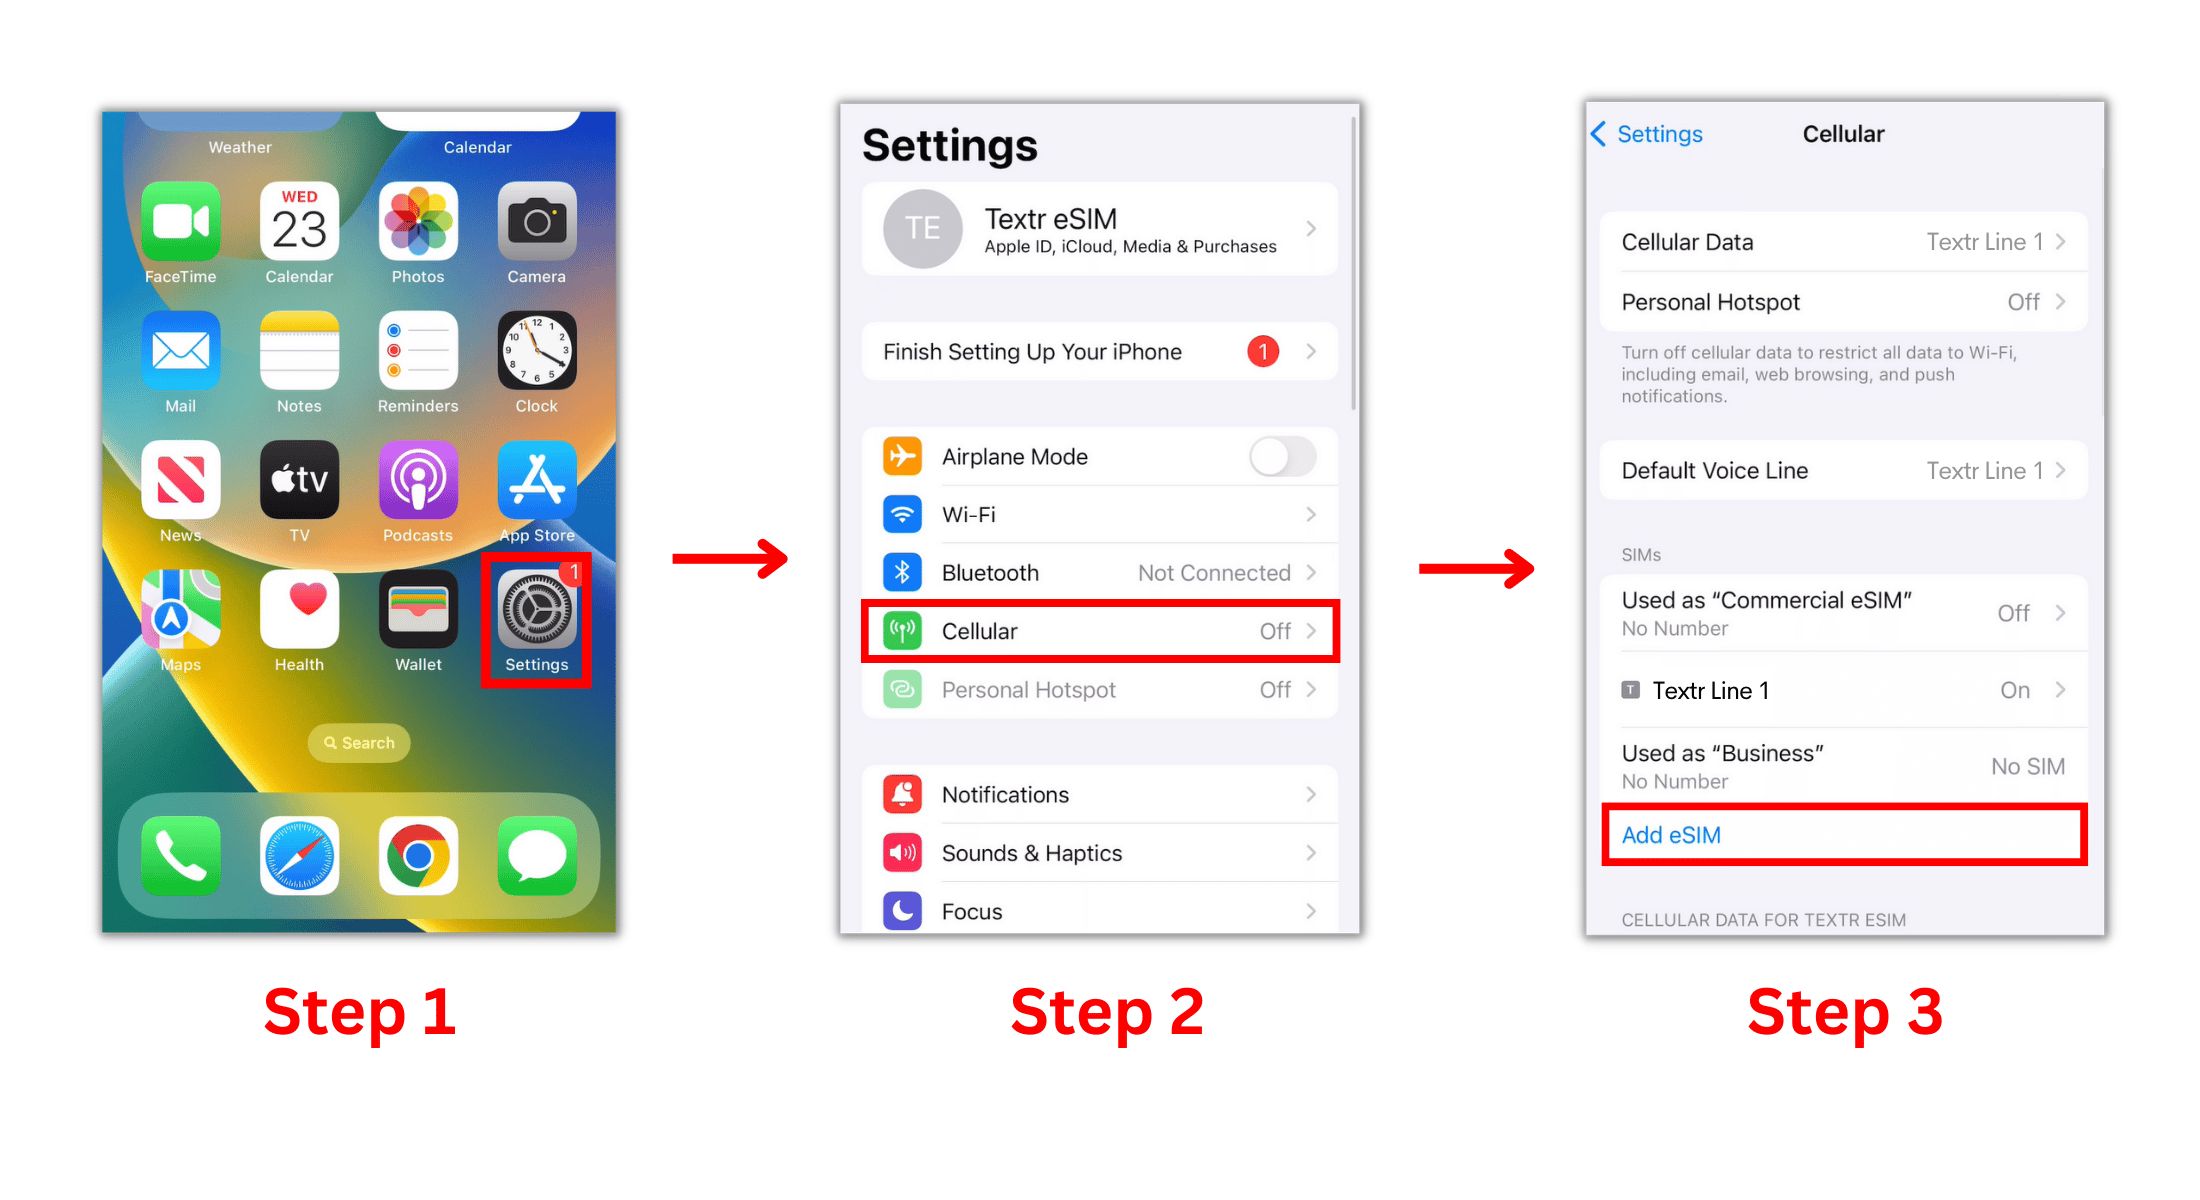
Step 1: Open “Settings” on your iOS device.
Step 2: Tap on “Cellular”.
Step 3: Tap on “Add eSIM”.
There are two ways you can install a Textr eSIM on iPhone or iPad. You can choose either QR code eSIM installation or Manual eSIM installation.
QR Code eSIM Installation
Step 1: Print out or display the QR Code on another device.
You can find Textr eSIM QR code when purchasing your plan:
Go to Textr eSIM webpage and click “My Data Plans”, then click “Valid” to find your valid plans.

Follow the instructions and click “QR Code” to get the QR Code for eSIM Installation.

Step 2: After you get the QR code, scan the QR Code in the “Scan QR code” page. Wait here for a while, the system will inform you when your eSIM is added to your phone.

Manual eSIM Installation
Step 1: Press “Enter Details Manually” at the bottom of the “Scan QR code” page
Step 2: Input the “SM-DP + Address” and the “Activation code” into the “Enter Activation Code” page.
Step 3: Wait for a while, the system will inform you when your eSIM is added to your phone.

Label Your eSIM as “Textr Line 1”
Step 1: In the cellular page, tap the eSIM you just activated under the “SIMs” column.
Step 2: Tap “Cellular Plan Label” on the top.
Step 3: Label your eSIM as “Textr Line 1” (or any other name you prefer).

For iOS15 or Older Version User
Set up a Default Line for texting, calling, iMessage and Facetime. Please be aware that Textr eSIM does not come with a phone number for texting and calling services.
Choose a Default Line to access cellular data:
- Select “Textr Line 1” if you want to use it now.
- Select Primary if you want to save Textr eSIM for later. Your data plan will not start until you connect to the local networks.

How to Activate Your installed eSIM
Step 1: Toggle on “Turn On This Line” and “Data Roaming” for Textr Line 1.

Step 2: Go to “Cellular Data”.
Step 3: Choose Textr Line 1 to consume data. It may take up to 10 minutes to connect.

Got questions? Feel free to contact our support team, we are here to help you.